
So why build a Cafe Racer. Let alone on a budget? Well, that's an easy one, they just look so damn cool. They also seem to be hugely popular right now too, popping up on TV shows and in blurry paparazzi pics of A- list celebs on a custom built version.
But if we want to get right to the heart of the café racer, forget all the media pizazz and cleverly engineered custom builds. Sit down in front of your computer and type in any of the following, AJS 7R, Manx Norton or Matchless G50.
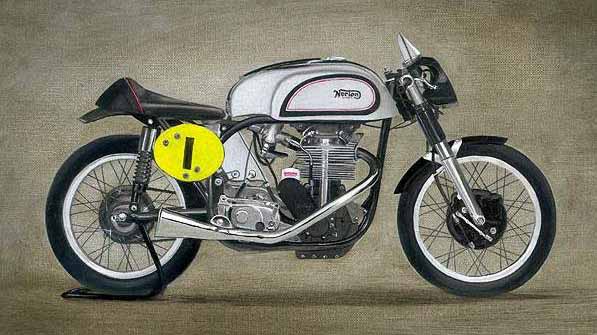
These were the race reps of their day, the cutting edge of technology in the 1930's and 40's and the bikes that gave the café racer riding Greasers, their inspiration.
Use these iconic designs for inspiration too, and in doing so, you're standing on the shoulders of giants. There's no need to fall into the trap of thinking that your café racer has to be a single or a twin. The donor bike can be virtually any make or model. Just bear in mind that some bikes, due to their frames and cycle parts, are going to be easier to convert than others.
Donor Bikes
If you are actively seeking a donor bike for your build, you can take some of the hard work out, by choosing something that lends itself more readily.
The obvious models always get wheeled out at this point i.e. the early CB 500/550/750 Honda's. But don't forget the later DOHC 750 and 900's, they've got nice big, slab-like gas tanks. Even the 500 and 600cc single trail bikes can get the CR treatment.
Late 70's and 80's Suzuki GS range are good too, whether singles, twins or fours. But don't be afraid to look at the GSXR's either. With all that bloody awful plastic removed, you've got a racing style tank already and a small rear subframe crying out for a retro style bum stopper.
There's a whole host of Yamahas just waiting to be converted, with lots of single and twin's, not to mention the XJ four's and XS 750/850 triples.

GSXR 1100
The same goes for Kawasaki, steer clear of the Z650 and 900/1000 as they're fetching premium money. But there's a back catalog full of singles and twins. The old 2-stroke triples make great donors and the four cylinder Z750s made throughout the 80's, are in plentiful supply.
It goes without saying that Italians, Brits and Harley Sportsters also make great café racers, but I've left them out purely because they attract premium prices. Like I mentioned earlier, this list is just to give you an idea and you can quite literally build a café racer out of anything.
In case you're wondering why I'm sticking to older bikes, there are a couple of sound reasons. Firstly, the cost, except ‘'classics'' like the CB750 and XS650, older Japanese bikes are relatively inexpensive. Secondly, bikes with simple carb engines and steel tubed frames are a lot easier to work with than those stuffed full of electronics and fuel injectors.
Ok, so your donor bike is sitting in the garage, and the spanners are at the ready. But before you can even start your quest there are a few things to consider, namely which parts are you going to keep and which will get junked.
Learn More About:
Tank

The tank and the seat of your project will ultimately dominate the end result, so the first of all take the seat, back mudguard and mirrors off. Now wrap a black rag around the handlebars, take a seat by the side of your bike and squint.
No, I haven't gone nuts, but nothing detracts from envisioning your cafe racer, like a pair of cow horns. So, wrapping a dark rag around them is just enough to blank them out visually, especially if you squint. Also by leaving only the tank in place, you can now see whether or not it's going to form part of the project.
If you can't live with the shape, you can go down one or two routes. Firstly, look online for a café racer style tank. These aren't cheap, you may even have some issues making one fit, but as far as looks go, they rock.
Alternatively, boogie along to your nearest bike breakers and start looking for something more suitable. Take your original tank with you, so you can check if the underneath of the replacement tank is compatible. Plus, you can check out the location of the gas tap.
Whichever you go with, just make sure the tank is firmly secured to the frame and isolated from vibration. The tank is a lot heavier when it’s full and the last thing you need is a few gallons of gas doing the rumba in your lap.
Seat
With the tank sorted, you can move on to the seat. Once again, it's time to decide if you're going to alter the stock or go for a new look. Modifying the original is a good option as the seat pan already fits your frame and you can either shorten it or get it reshaped with a hump and recovered.
Alternatively, there's a huge choice of traditional style racing seats available online, either with universal fit or custom made. The things to consider here are getting a neat fit against the tank and more importantly, securing it to the frame.
Handlebars

With these two elements complete its possible to see the project taking shape. You can now sit on the bike, so it's time to choose some handlebars. I know clip-ons look cool and if you are just ambling along for a Sunday morning Latte, they're fine.
But for any regular kind of mileage though, especially through traffic, due to their lack of leverage, they're a pain in the wrist as well as the ass. A less radical solution are ace bars.
These give you the same hand placement as clip-ons, and that forward leaning crouch. But because they sit in the handlebar clamps, don't put so much of your weight on the wrists. You can even get adjustable ace bars, a design borrowed from the original Laverda Jota, which allows you to fine tune your grip position.
Clocks
Staying at the front end, what kind of clocks and idiot lights do you have? Chances are if it's an older Japanese bike, the speedo and rev counter will be analog, driven by cables.
Analog gives you the choice of either dumping them for those neat mini gauges or just keeping the speedo and mounting it centrally. A third alternative and the quick fix answer is to buy a small fly screen. They sit above the headlamp following its curve and wrap around the clocks just enough to hide them.
If you choose the latter route, decide on what you're doing with the headlamp first. A classic café racer look calls for a big old chrome unit with a deep conical back. The deep back is ideal for concealing untidy looking wiring. And some even have a circular hole cut in the top.
Headlamp

This design is based on the old Lucas (Prince of Darkness) 7'' headlight and was originally intended to house the amp meter. But you might even be able to house a mini speedo or rev counter in there. You should also look for some classy looking headlamp brackets too.
Ok, time to take a look at what we have so far. With the tank, seat, handlebars and headlamp in place, you've got the basic ‘dry build' elements of your café racer. But there are two more large pieces of the jigsaw still needed, the exhaust and the foot controls.
Rear sets
Let's start with the foot controls first. Sit on the bike reach forward to the handlebars and put your feet on the pegs (obviously while still on the center stand or with someone holding the bike, duh). The controls may feel awkward now that you've altered the riding position, or you may be lucky, and they feel ok.
Depending on how the footrests are mounted, you may be able to reposition them slightly further back or lower. You may also get away with altering the angle of the gear lever, but brake pedals are slightly trickier. If neither is possible and your feet just don't feel right, then its rear sets for you.
There is an excellent chance that you won't get them off the shelf for your particular bike. But thanks to the popularity of CR's, there are lots of universal fit rear set kits out there, so get creative.
Exhaust
Last but not least, the exhaust. If it's got any sort of sound deadening silencer fitted, that just sits there parallel to the ground looking bored, the very sight of it will be enough to give a nervous twitch. So, remove it immediately, take it outside and give it a sound thrashing with a hammer.
Doing this serves no particular purpose other than making you feel lots better. Exhausts are part of the heart and soul of your café racer, they proudly announce your arrival and mark your untimely departure.
Keep your stock down pipes, by all means, just paint them heat resistant black. If, however, you feel the need to buy exhaust bandage, seek medical help. Traditionally speaking classic CR's always have short, reverse cone mega's (megaphones), but you can fit any silencer you like. As long as it comes up at a slight angle and it's loud enough to make you smile.
And that my friends is about all I have to say. Yes, I know we haven't touched on the front and back mudguards yet but whether you run them or not is down to you, your state laws and the amount of precipitation you get. And as for paint, I'm with Henry Ford.
Start To Finish Video
Just the Beginning
This article is aimed primarily at those like me, who have neither the technical skill, budget, nor patience, to build some mega-buck show winner. There are some wonderful articles out there on the web that elucidate grandly on the aesthetic references and design concepts of creating a café racer.
But by the time you've read and pondered them over a half fat mocha latte, you could have built yours, painted it matt black and been enjoying life leaning over the gas tank.
There are still, without a doubt a million and one things you can do to your project. Ranging from tuning the engine and suspension to upgrading the brakes and drilling holes in everything. This advice is, therefore, merely your starting point, there's no right or wrong way to build a café racer, just your way. Enjoy.